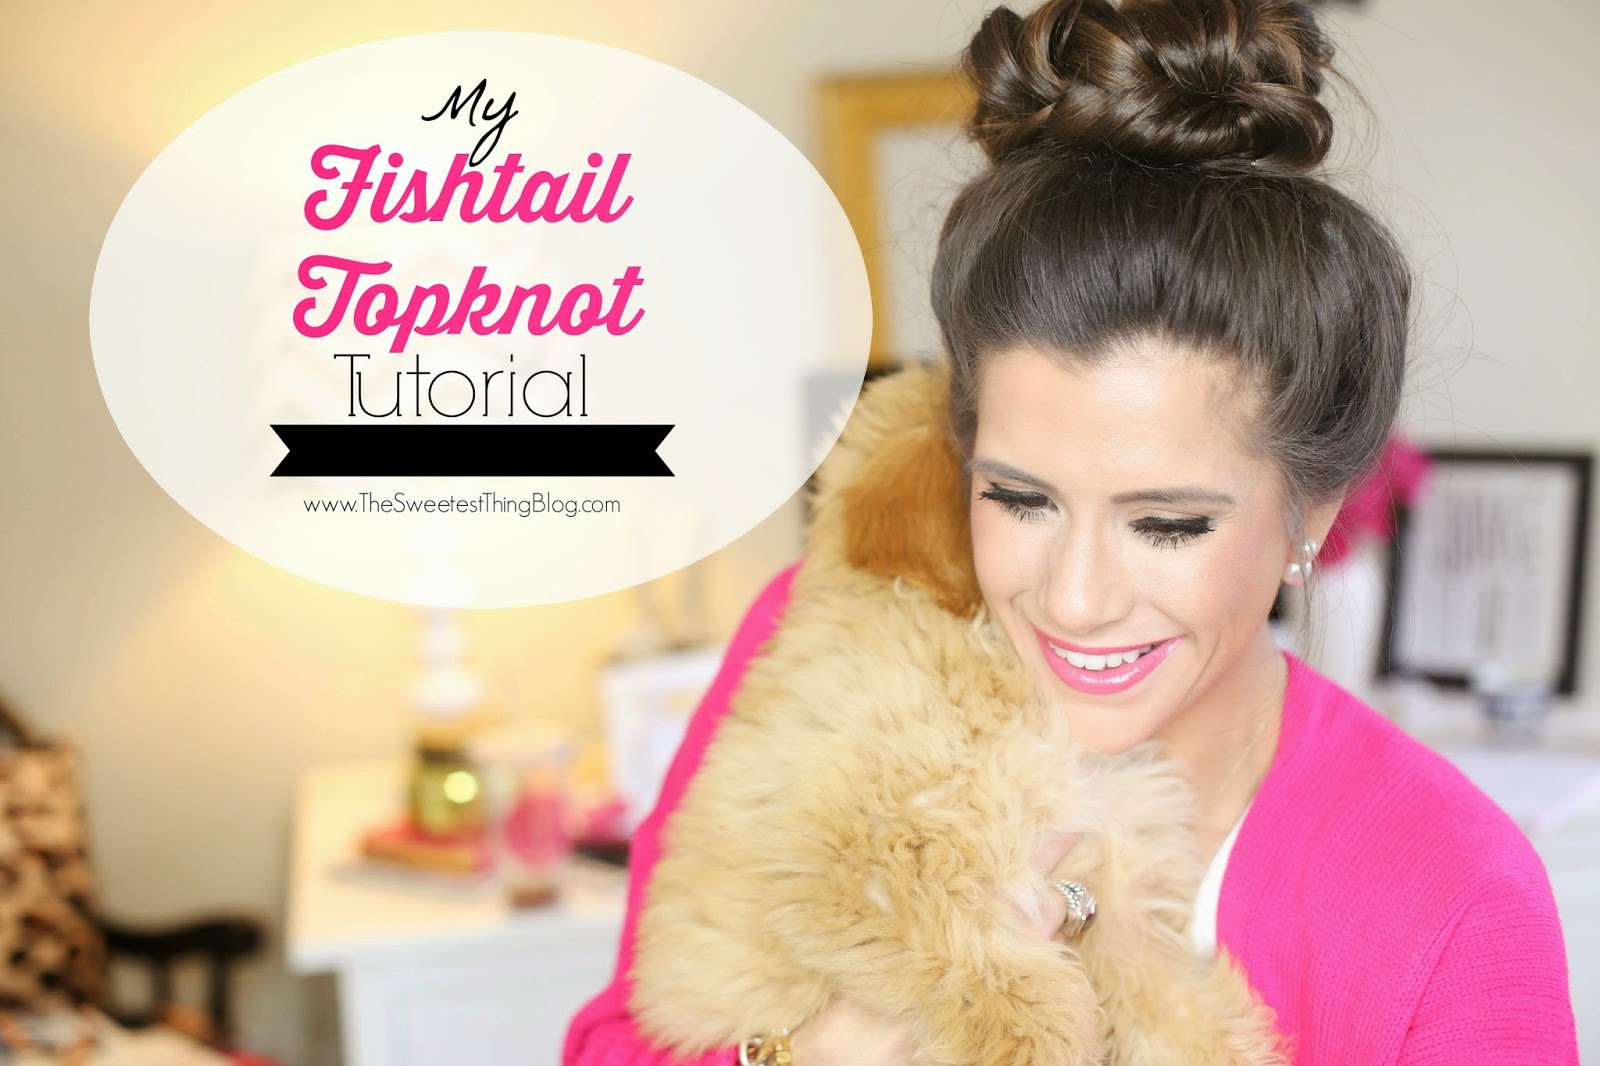
This past few days I’ve received so many e-mails regarding the Fishtail Topknot that I did a while back. Honestly, I more or less came up on the hairstyle while I was trying something else – funny how that always happens. Bear with me on this one, my camera does not have a self time (apparently?) and John’s been working so I had to take these with catlike skills, haha! I won’t go into detail on that but I was able to get all of the steps included into the pictorial as well as a GIF of how exactly I do the WRAPPING of the fishtail.
AND, thanks for all of the feedback on Instagram! I was excited to do this pictorial. Someone (Hi, Susan L.!) asked for more of Fitz so I tried to include him in that first pic but he wanted nothing to do with The Sweetest Thing today, lol!!! He was sleepy I think (aka cuddly!).

Steps 2-4 are optional – I just wanted to share that I was clipping in a weft of my Bellami 20 inch extensions for length. Read more about my extensions here.
1. BRUSH HAIR OUT THOROUGHLY!(!!) My hair was on its 3rd day here.
2. If you are using extensions, brush them out as well.
3. Divide the hair in half and make a half pony up top… Try to make a pretty neat line w/your divide.
4. I put my extensions on upside down – the way they would go w/a ponytail. This is optional – I have just found that they lay a little better like this.
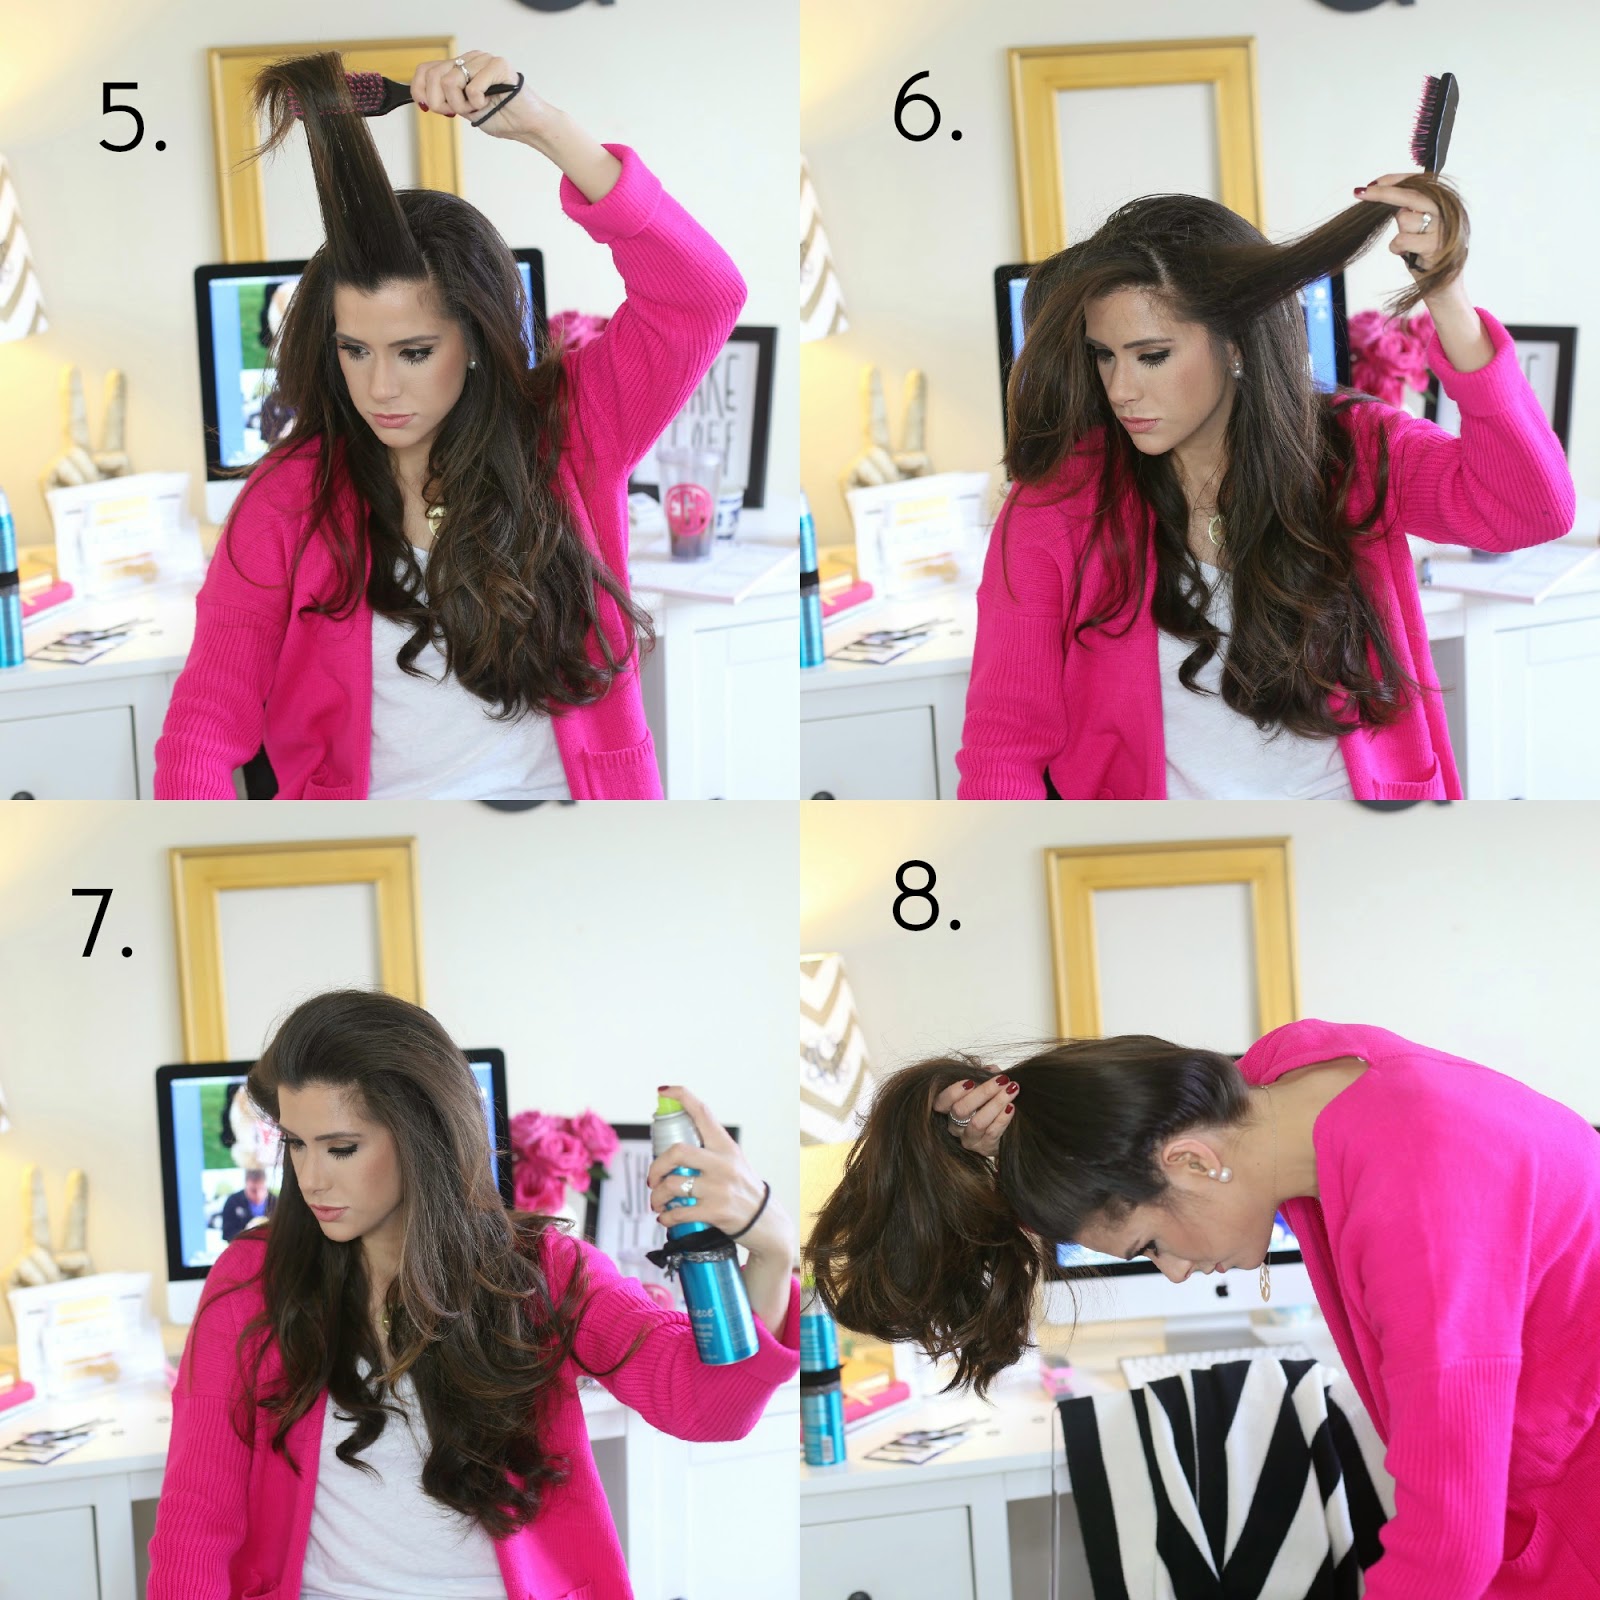
5. I take my ‘bangs’ or the front, top section and do some light teasing.
6. Then I take each side (just the pieces closest to the face) & tease those as well.
7. Brush the tease out – or to your liking 🙂 and give it a little hairspray.
8. Flip your head over and brush into a ponytail.
NOW, I like my topknots to have a little fullness. I tease the hair just to keep it from being flat or stuck to my head since it was a little dirty. Also, I tied my ponytail around my hair 3x to keep it as tight as possible!

9. Adjust your ponytail to where you’d like it. I like mine to sit pretty high on my head. Once you start braiding sometimes you tug it down a little so just keep that in mind.
10. Split the pony tail into two and begin the fishtail. (Super easy – watch this.)
11. This is what my fishtail looks like half way through – it is kind of weak looking.
12. This is how it looks when I am done. Not the cleanest (my arms were hurting!), but I wanted mine a bit messy. I use a black elastic to secure the braid.
Next, is a GIF of the wrapping of the fishtail. (John called as I was doing this – I told you I was having issues w/o a self timer!!!)
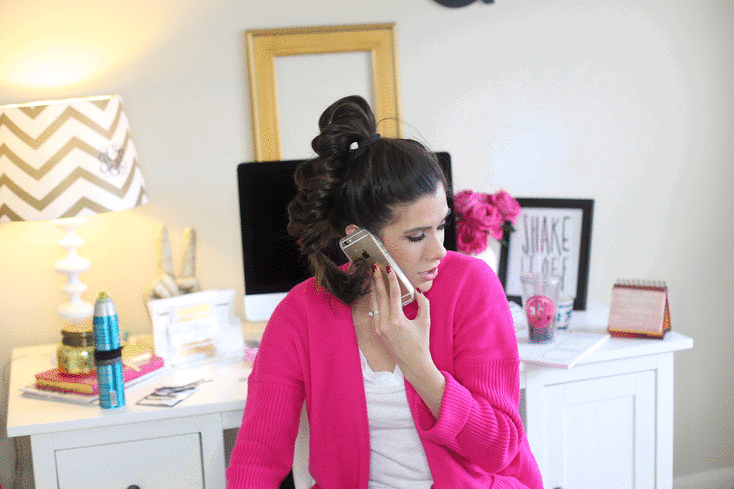
I tuck the end of the braid back into my ponytail holder!
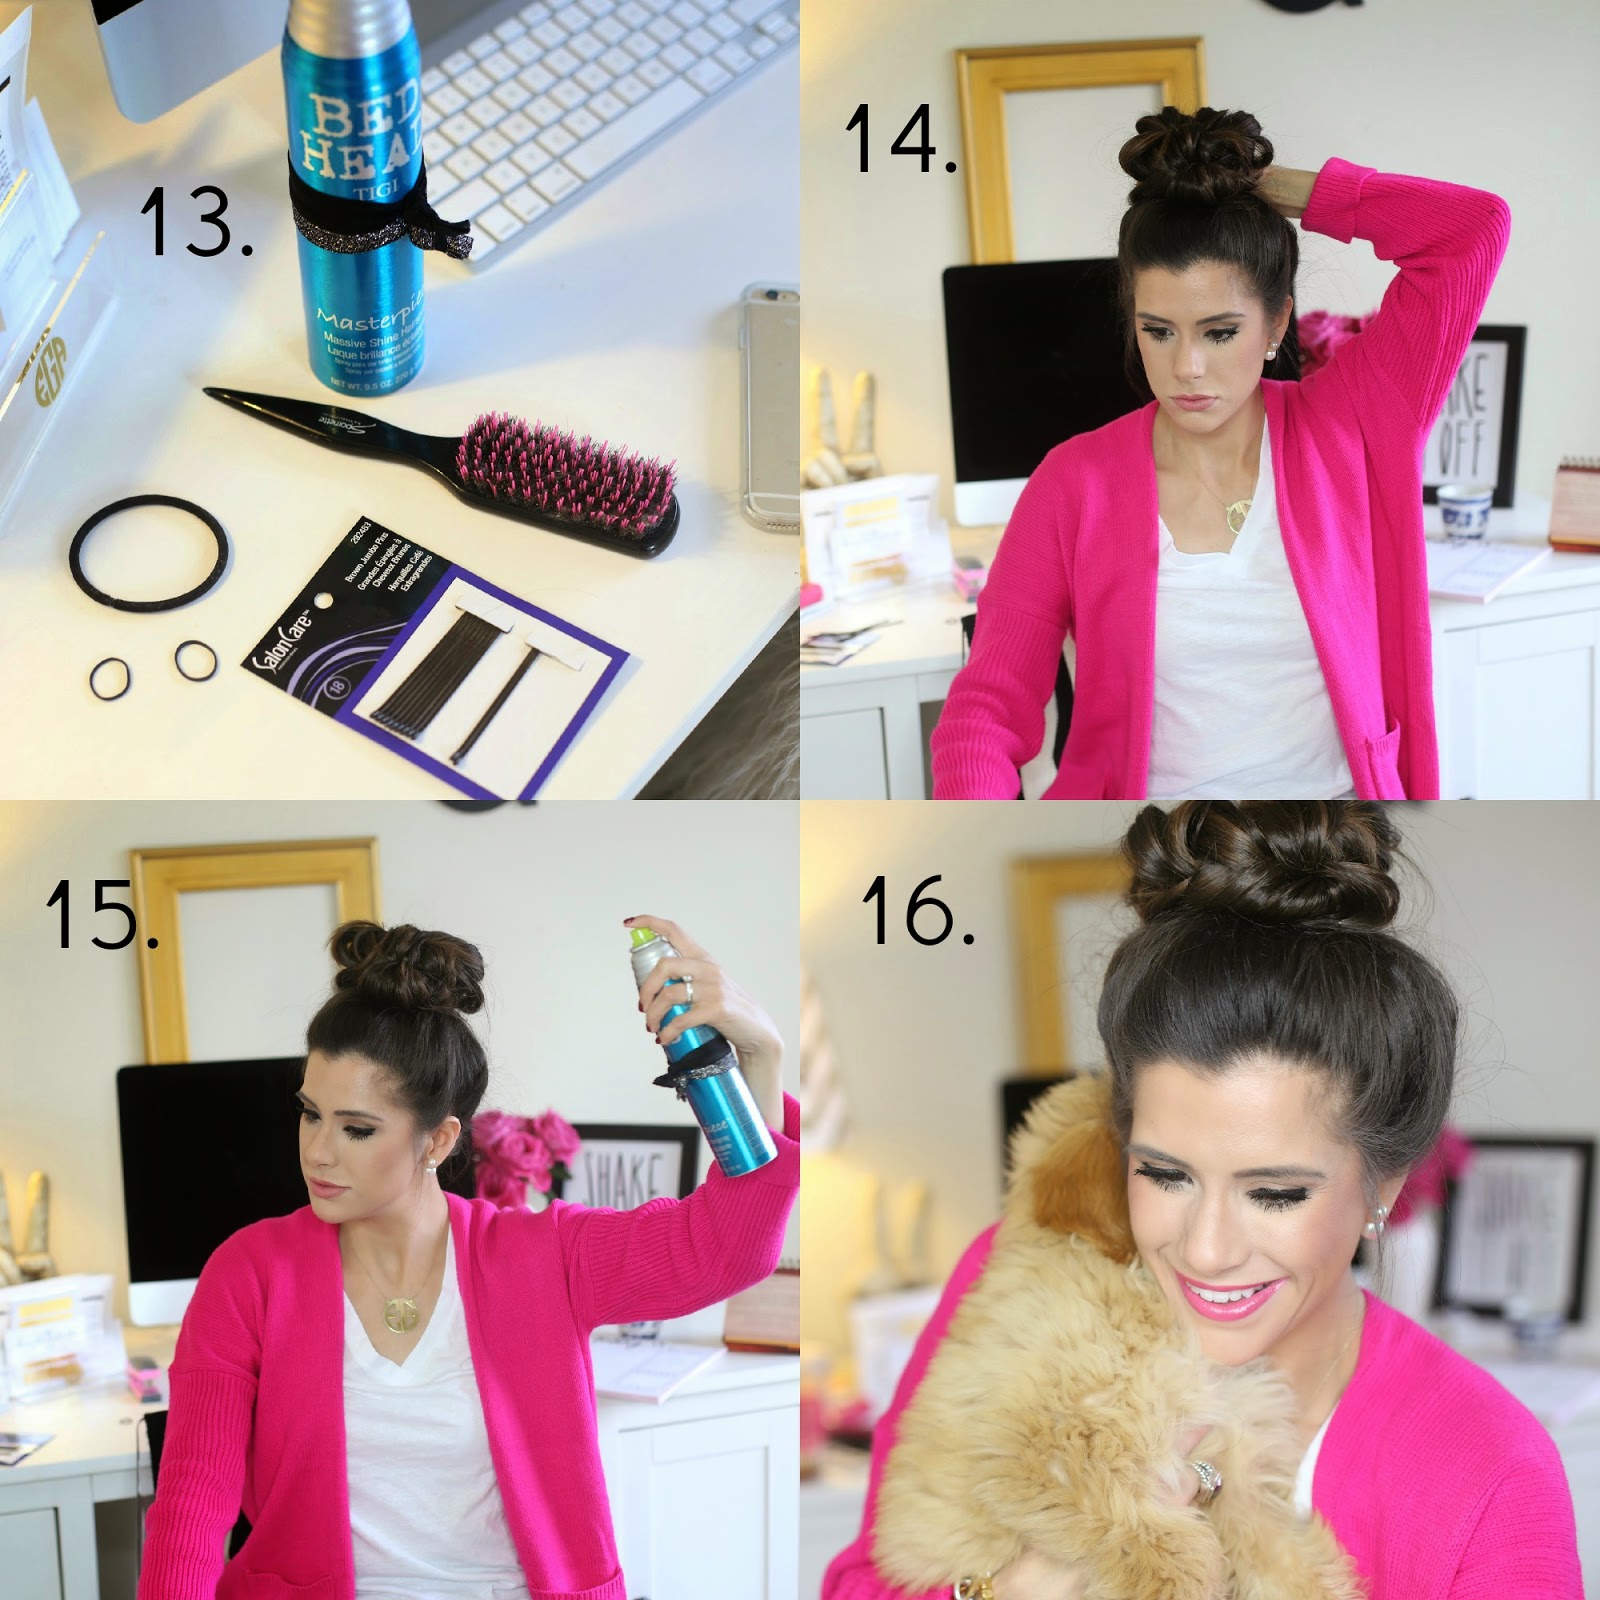
13. Grab bobby pins. These larger, thicker ones are my best friends – my hair tends to slide out of the smaller bobby pins.
14. Use the bobby pins to tuck away the looks pieces… or you can keep some out for the messy look!
15. Spray away. And then adjust – I like my bun to be kind of puffy and my hair not so flat so I pull and tug a little bit.
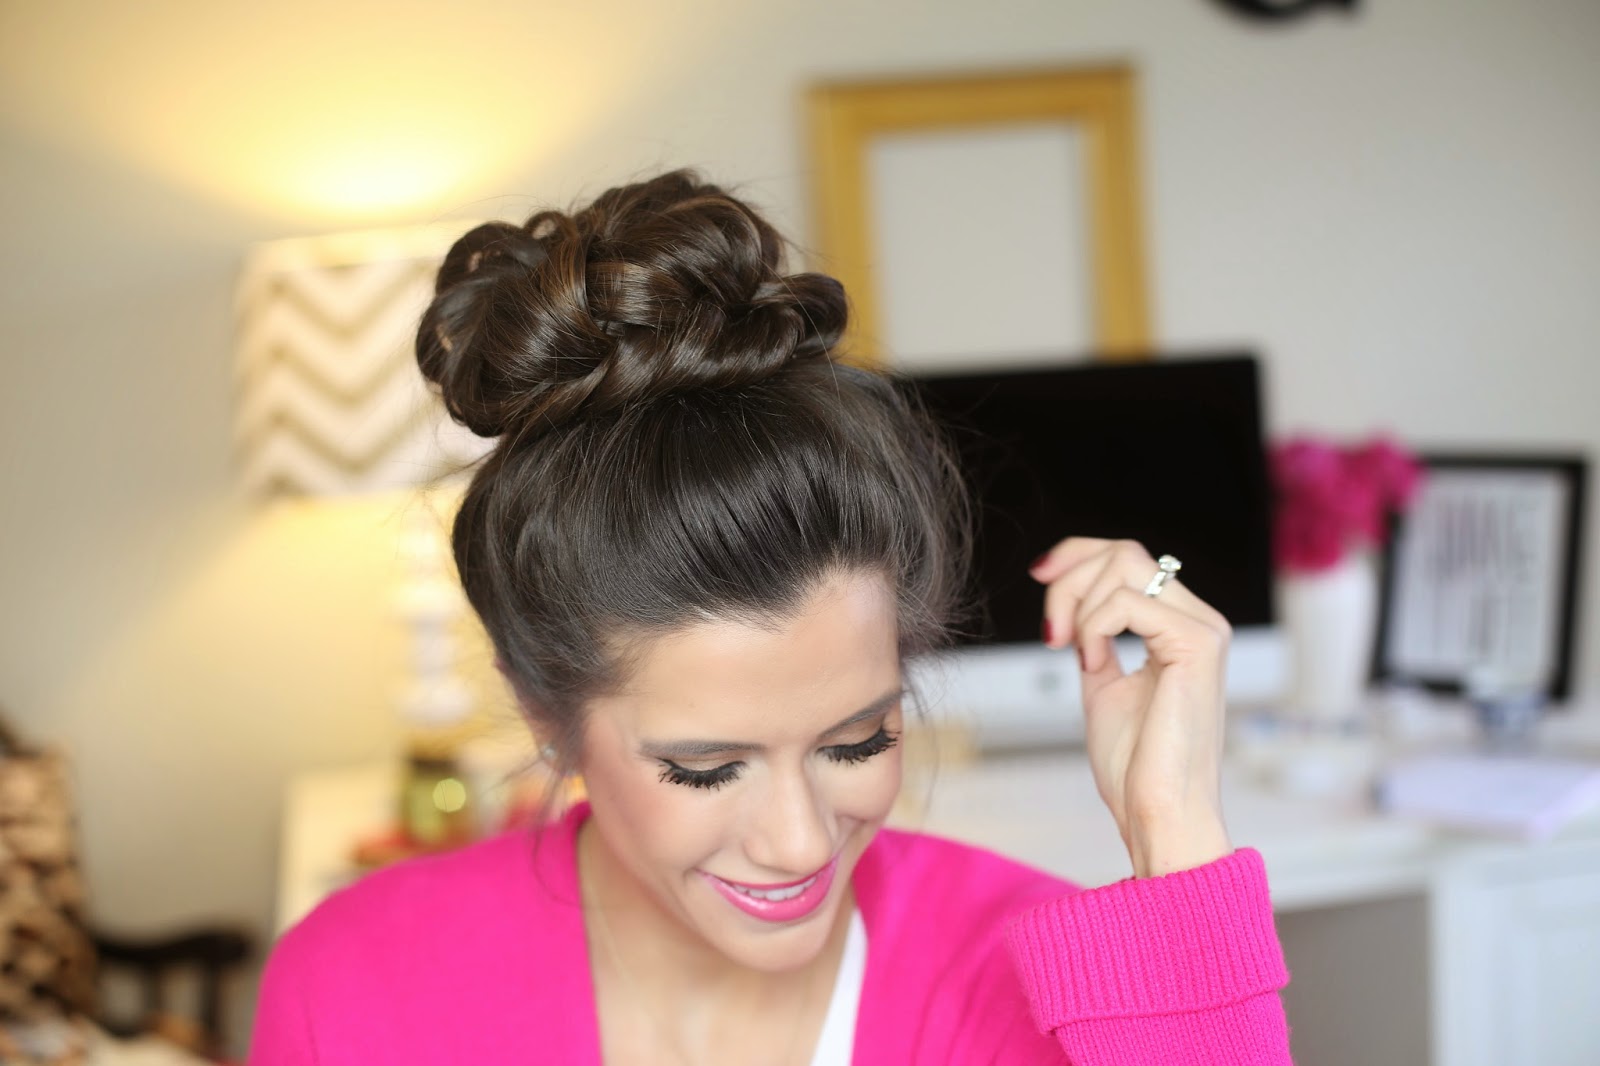
16. Final result.
(Necklace) (Earrings) (White Tee) (Similar cardigan here .. & linking some cool cardigan options below)
(Hairspray) (Teasing Brush) (Bobby Pins)
PS. The time to start Christmas shopping is now (Loving this GIFT giving guide!).. shop a few stocking stuffer ideas below!


Your pictures are always so beautiful! What kind of camera do you use??
Love the last photo and that scrabble mug is perfect for me!
I love this top knot!!! Such a cute look! Amazing tutorial, thanks for sharing it!
The Style Storm
<3, Christina
I love it! It looks amazing…My hair is so long that I always struggle getting it to stay in one of those 'donut' bun rings…so I think I'll have to opt for this fishtail braid bun instead, thanks for sharing 🙂
xxx
Tasmin | Grandiose Days Blog
Great tutorial, that's a perfect topknot!
http://lartoffashion.blogspot.com
Love this hair do!! Going to try it out 🙂 Is it better if you hair is slightly dirty or can you do it on clean hair as well?
love this!
giveaway on my blog!
http://hashtagliz.com
Gorgeous! I always struggle with updos, but this one is gorgeous!
xx,
La Joie de Vivre by Alecia Mariana
Facebook//Twitter//Instagram // Bloglovin
I wanna try this now! Great post!
http://annlooos.blogspot.com
Love it! And as always love Mr. Fitz 🙂
I think clean hair will work as well! My hair has a very soft? texture so it needs to be dirty to give it a little texture in order to old the style! Does that make sense?!
Nice 🙂
http://sbr-fashion-fashion.blogspot.com/
Nice post! You look gorgeous!
♥ ♥
http://www.MARTAsFASHIONdiary.com/
Love that hairstyle! You pictorial is so helpful!
Libby
Stylin' Iowan Blog
Love this look. I am definitely going to try this tomorrow. I especially liked your note about clipping the extensions in upside down. I never thought of that and always have trouble hitting that area with updos.
Great tutorial!
http://www.FashionSnag.com
Absolutely amazing – something I really need to work on is mixing up my hair styles. I think I'll start here… 🙂 Thanks for sharing, girl! Xo, Alison
http://www.simplyfairbyalisonjeanine.com
Do you add extensions for length or thickness? Just curious since your hair seems so long and pretty already! I ordered my bellami a while back and need to play around with it already — I am feeling inspired 🙂
xoxo,
The Quintessentials
Amazing hairstyle!!!
Be Happy with Fashion
This looks so perfect!!!!! Also how do you take photos like this, do you use a tripod and remote?!
Thanks for sharing! I love wearing my hair like this thanks to you!
xo, Shantell
http://www.getyourchicon.com
Hi Emily! Beautiful bun tutorial, can't wait to try it! Thanks for the post 🙂 xoxo from Miami – Jessy
http://www.letsfallinloveblog.com
Yes it does thank you! Cant wait to try this out 🙂 Love Love your blog
Very cute look!
Gosh this is stunning. I can't wait to give it a try (right now!).
Love from South Africa
Arum Lilea
I love this! It's so different I will have to try it soon! 🙂
-Tiffany
http://www.glamorizewithgrace.com
I love this look! I can't wait to try this on my lazy hair days! Thanks for sharing!
Evolution of Glam
I love your hair tutorials! Your hair really is amazing!
Katelyn Marie
passthebubblyblog.blogspot.com
It is nice style.
Vietnam Virgin hair:
vietnamvirginhair.blogspot.com